Kristina here. Hope everyone is doing great out there in cyber land.
I have a tendency to take a new technique or new idea and become totally obsessed with it for a short amount of time. A while back I was completely obsessed with making plarn (plastic bag yarn) but had not made anything with it. The local scrap exchange (very cool store) was having an event so I thought, hey I'll make a bag for it. Well 1 turned into 4. Check them out in the pictures below.
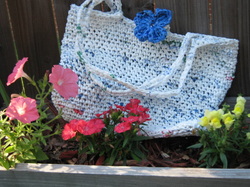
The white one was first, it was just a basic big tote bag and I decided to throw a big blue flower on it. I definitely had more white and brown than any other color.
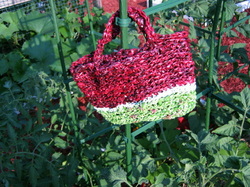
I had so much fun that I decided to try another one. I made the watermelon bag next. I only had so much of those great colors and used them all so it ended up being a cute little clutch bag.
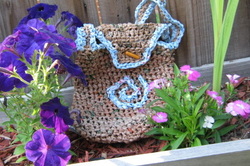
I couldn't stop myself so I made one more using up all the brown I had to make a little lunch bag and all the light blue I had trimming it out. I have never done surface crochet before but I was just staring at the empty bag and it seemed to be staring back at me. I just gave it a try and I think it turned out very well. I am very pleased with the little spiral that presented itself to me. The little wooden toggle was upcycled off of an umbrella that broke in the wind.
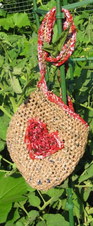
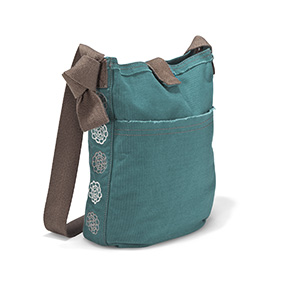
I got some more brown bags and everyone said the spiral one should have had a shoulder strap so....
The newest addition, a shoulder hanging bag with a tapestry crochet heart on it. The heart was originally just an outline but it looked so dull so I decided to fill it in.
It was super fun making these bags, they were pretty easy and the big stitches lent themselves well to the surface crochet. I think I could make just about anything on them. Now I just need more colors. If you have any crazy colors let me know, I'd really like some pink and or purple.
I became the proud owner of a couple dozen used jeans in several colors as well as some khaki pants. So....hey how about figuring out 101 ways to reuse jeans? Great idea!!
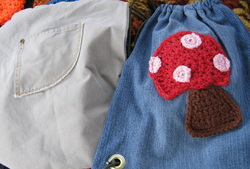
Way number 1 is these cute toddler backpacks and/or shoe bags if you travel. I used blue jean legs and khaki legs. I found the instructions here:
http://mamaurchin.com/pats-tuts-and-how-tos/how-to-sew-a-string-backpack/
Well seems the celebrate crochet month took a lot out of us and we haven't posted anything in over a month. Opps ;)! Well, going to start posting a bit again - Millie is going to be posting updates on her garden and a new goal - 101 ways to reuse blue jeans (ideas accepted send them over!) and Kristina will be throwing in some info on other crafters and some cool free crochet patterns, tips and tricks. Keep posted and let us know what YOU want to hear about!
 I will link to facebook in a new window
 We may or may not have mentioned that we have joined a team called Acorn to Oak. Well this isn't about them; however, we recently did a like swap where everyone goes and "likes" everyone else's facebook page and makes a little post/comment. While that is swell and all I took it as a chance to meet my team mates. Now I'm passing on that knowledge to you. Yes I'm generous I know, lol.
 I link to etsy in a new window
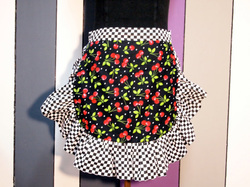
 First off is Villainous Vixen. As you can see from the great pictures she has some really cool unique stuff. Ok so its not crochet, but I like more stuff than just crochet so I assume you do too.
Each picture links to a different place so click them for fun.
She has rockabilly and goth mostly. Some cute aprons, great earrings, and neat brooches. She also has some great clutches and some neat headbands.
I was enamored with this foam head.Sadly I thought it was a cool mask, but its not. The headband is cute but not as cool as the face.
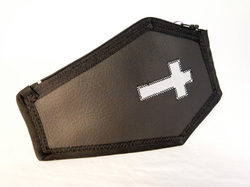 Gothic Coffin Purse
 Talk about unique! This little clutch purse is too neat! You could have your own mini coffin to hold your cashola, credit cards or just some pictures of the family! Couldn't you totally see yourself pulling this out at the store?
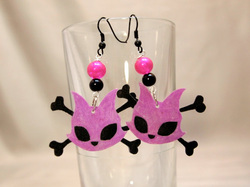 Rockabilly Pink Kitty earrings
 These are my favorite item! They are just so cute! Who doesn't like cute little pink kitties! She has some other great earrings in her Etsy shop, you really should check it out.
I was disappointed to not find a blog of any type to link here, if you find one let me know. Feel free to leave comments on what you think of the oh so cool Villainous Vixen.
Also remember to send your ideas for the reuse jeans project, crafters you would like us to meet, or a tutorial on a crafted item. Thanks for reading, Kristina
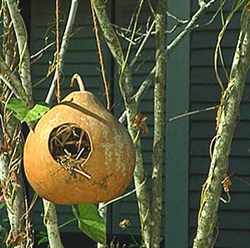
Gourd Bird house found on http://www.pallensmith.com
MATERIALS:
Gourds
Steel wool
Fine grade sandpaper
Electric drill
Circular drill bit
Regular drill bit
Twig
Hot glue gun with glue sticks
Water sealant
Twine or thin wire to hang birdhouse
DIRECTIONS:
Dry. If your gourds are already dry move on to step 2. Gourds can be air-dried in a well-ventilated area like your garage. It may take as long as a month. You can tell they are dry when you can hear the seeds rattling inside.
Clean. If crust or mold develops during the drying process, just wash the gourds in warm soapy water with a steel wool pad.
Sand. Once the gourd dries out and you have washed them up, take a fine grade sandpaper and lightly brush off any rough edges.
Create an entry. Now that you have a clean, smooth gourd to work with it's time to make an entry for the birds. Use a drill with a circular bit to carve out a hole (about 1 ½ inches) that is large enough for birds to come and go.
Drill. Next change drill bits and drill in several holes on the bottom or drainage as well as a couple of holes on the top of the gourd for hanging the birdhouse and a hole under the "front door" for the perch.
Sand again. If you find any sharp edges sand those down at this time.
Clean house. Now once all of this is done you're ready to scrape out the insides using a stick or wooden spoon.
Add the perch. Insert a twig into the hole you drilled for the perch. I used a twig from a red twig dogwood. If it doesn't fit snugly secure it with hot glue.
Seal. Spray the gourd with a water seal. This will help to preserve the birdhouse for years to come.
Hang. Pull twine or fine wire through the holes in the top of the gourd and hang the birdhouse in an area that is easy for you to see but sheltered so the birds will be safe from predators.