A word of thanks for family and friends! Where would we be without them? Hugs and kisses to you all!
Merry Christmas, Happy Holidays and Best Wishes for a Great and Fantastically Creative New Year!!
I am such a slacker! I totally forgot to upload the pictures from Thanksgiving and it's almost Christmas! 
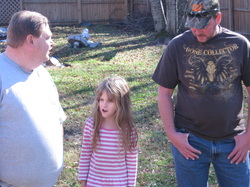
Greg, Lin and Rami talk about the frying turkey (you can't see the fryer but it's there and it's cooking a great turkey!). Greg injected our turkey with cajun spices and butter then sprinkles sea salt and spices on the outside to make the skin so tasty. Yumm! Once you have had fried turkey you will never want to eat a baked turkey ever again. 
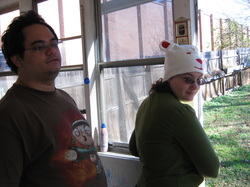
Kristina in her funny hat and Mark chilling on the back porch watching the grand babies run around the back yard. We had some great weather that day - sunny and cool. 
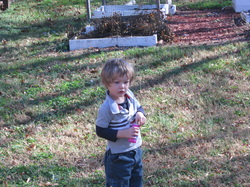
Mr. Cuteness himself, Bob, blowing some bubbles. He had a great time running around, kicking a ball, chasing the dog, chasing his sister and blowing bubbles when he needed a break. 
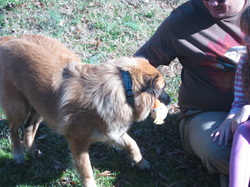
Even Layla got some loving and had fun playing catch with her stuffed chicken. Unfortunately the chicken didn't survive much past this day. A few days later she had chewed it to pieces. Seems she really likes stuffing. 
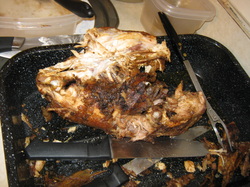
Here is the turkey carcass. We pretty much demolished the poor bird but man was it delicious!!
A word of thanks for family and friends! Where would we be without them? Hugs and kisses to you all! Merry Christmas, Happy Holidays and Best Wishes for a Great and Fantastically Creative New Year!!
0 Comments
Well I once again waited until it was too late to plant a green mulch cover for my garden. So I went out, buried what compost I had been saving in zip lock bags in my fridge. For more information on composting see our other blog on the subject. The beds are a bit bigger than our trash bags so we used scrap pieces of wood to hold down the edges on some and used some garden soil to hold down the others. My husband said this was the poor man's way to winterize the garden which is fine since we are poor :). Hopefully the plastic will help the beds stay warm and encourage lots of worm munching of the compost and paper which will add some great worm casings and worm tunnels for my spring garden. Get your heating system checked by a professional as soon as possible. It's better to have a check up to identify any potential problems then wait until the heater isn't working since most companies charge extra for emergencies. Get your duct work checked out. Dust, dirt, animal/people hair and more can clog or block your duct work making it work harder to get the air to you. Over time joints can pull apart, leaking your warm (or cool) air into the wrong areas - don't throw your money away heating up your crawl space! Also remember to change your filters once a month (or as often as the manufacturer recommends). Let's all have a fun, safe and WARM winter :) One of my oh so pretty marigolds :)
One of the charities we like to donate to is Little Dresses for Africa (littledressesforafrica.org). For Oct - Dec we will be focusing on making as many of these little pillowcase dresses as we can! In addition, we will be having a sale in our store - BOGO - Buy One, Gift One! The dresses will be listed in pairs, you can buy one for your child or a child you know and the other in the set will be sent to the charity. Of course, you can choose to have both sent to the charity as well. We thought you might be interested in how to make these little dresses. First, take a pillowcase and cut out the arm hole area (not shown and the pattern is at the little dresses site). Next make a casing for the elastic at the neckline. Run the elastic threw the casing which will gather the front and back of the dress to help fit the girl as well as look fashionable. Next step is to put binding along the armhole area and extend the binding out both sides (at the time) as a tie. You can also fold over this edge and sew it down and run the binding for ties thru the neck casing instead of using the elastic. We wanted to dress up our dresses with a pocket so here we were trying to pick out a pair of pockets that would coordinate (we wanted the dresses to look a bit different). We have so many choices from so many pretty fabric scraps thanks to our local scrap exchange (scrapexchange.org). Wonderful place!! Hem the top of the pocket and then iron down the sides and the bottom of the pocket. Choose where you want the pocket to be and then sew along the sides and bottom. We choose to offset the pocket to one side. The little dresses site asks for minimal additions to the dress due to the fact it will be so hard to replace lace and buttons but they do recommend a pocket! Who doesn't like a pocket? One pair is complete! You can see how nice they look together. We started with a pair of identical pillowcases but as you can see, just by using a different scrap of fabric for the pockets, we have two different outfits! Our hope is that these little dresses will brighten a little girl's day and bring some joy to her life.
If you have any questions, comments or donations, let us know! Thanks for reading! Millie & Kristina http://www.etsy.com/listing/87552379/pillow-case-dress-child-size-buy-1-gift http://www.etsy.com/listing/82506132/pillow-case-dress-child-size-buy-1-gift A wonderful friend gave me several of the bubble wands from her wedding (thanks Latoya!). I decided that I would make them into a key chain so that I could take my bubbles with me everywhere!! After all you never know when you might need to blow some bubbles! As usual I couldn't make just one so made an assortment of colors. :) This is a great scrap buster!
I used a variation of this pattern for a chapstick holder (which I made a dozen of!): http://www.crochetspot.com/crochet-pattern-chapstick-key-chain-cozy/ Basically I ch 2, did 7sc in first ch. Then in bl only I crocheted sc in each stitch, for 12 rows. Then I chained 10 and ss back into the beginning ch for the key chain loop. Ta dah! A key chain holder that you holds your bubbles so you can have them with you everywhere! In an effort to help the environment, we made our own facial scrubbies - these are great! You use them to wash your face, throw in the wash, and reuse. One problem, they lay around the sink, fall out of the stack and make a mess. So we designed a basket to hold the little buggers. Here's how we did it: Basket Spa Essentials Face Scrubbies and Great scrap buster project because it uses small amounts of cotton yarn (I used Sugar and Cream) Scrubbies: Make 7 Ch3, 12 dc in 3rd ch from hook. Join and ch1. 2dc in each ch across (24) Finish off and sew in the ends. If you prefer a larger scrubbie, add a 3rd round by joining, ch1 and dc same stitch, *2dc next, dc next ch*, – repeat around R1: ch3, 12 dc in 3rd ch from hook. Join and ch 1 R2: 2sc in each stitch around (24) R3: dc first stitch, 2dc next, repeat around (36) R4: sc first two stitches, 2sc next, repeat around R5: sc first three stitches, 2sc next, repeat around R6: (this row back loops only) dc each stitch around R7 & 8: sc each stitch around R9: dc each stitch around R10 & 11: sc each stitch around, finish off and sew in the ends. R1: Ch3, 12 dc in 3rd ch from hook. Join and ch1. R2: 2dc in each ch across (24) R3: sc first, 2sc next, repeat R4: dc first two, 2dc next, repeat R5: (back loops only) sc each stitch around. Finish off and sew in your ends. (This scrubbie I made a 3rd row of shells (ss 1st stitch, 3dc in the next stitch, ss next and repeat around.) For the lid pull:
Cut 2 pieces of yarn about 6-8 in. long, fold in half and make a knot about an inch or so down from the uncut loop end. Thread the loose ends in the center hole of lid, knotting underneath. This leaves the loops sticking up to use to open the lid! Quick, easy, customizable and makes a great gift for everyone. Perfect little stocking stuff or a co-worker gift. |