Picture
Hey everyone, Kristina here.
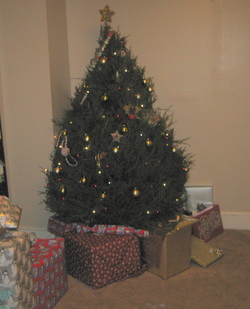
My husband, the kids and I went to visit my in-laws for New Years. We were there for a whole week. A whole week of no cleaning or cooking! Woohoo. We had a late Christmas party too, we all got to open presents and have a Christmas Turkey. How neat, 2 Christmases in one year.... sorta. We didn't do much for New Years. We watched the ball drop but that was it. No fireworks or anything this year. So sad. What did you guys do for Christmas and New years?

Picture
Any resolutions this year? I'm a bit of a recluse, a hermit, so my resolution is to get out there and meet people and do... stuff. I don't know what yet. Any ideas?

Well anyway, since I had a whole week of no cooking or cleaning I had some spare time on my hands. Admittedly much of it was spent chasing my 3year old around the house to keep him from breaking anything.

Picture
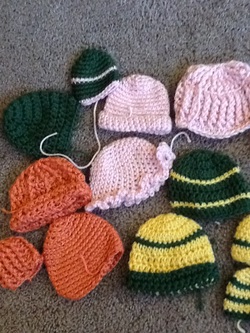
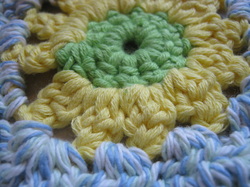
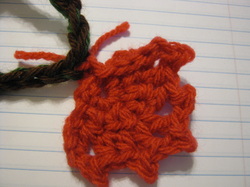
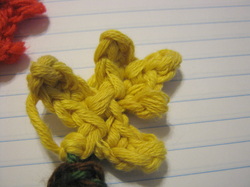
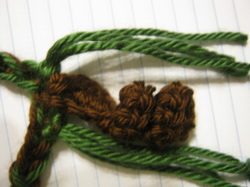
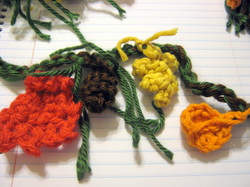
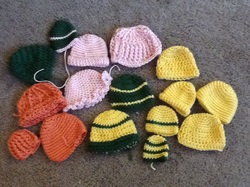
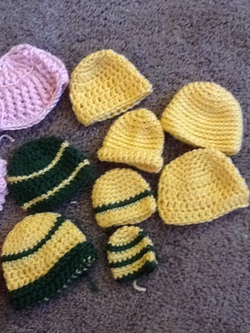
But I did get some crocheting done! I had 4 little left over skeins of simply soft with me so I decided to pump out some NIN preemie hats before the January meeting. I tried to make each one unique and beautiful. I used several techniques but my favorite is FPDC and BPDC as you can see  by all the ridges in many of the hats. I also did some sc in BLO so there was a fun spiral running down it to keep it from being boring. I used up all my Simply Soft yarn so hopefully the babies will be happy with all the hats I made this month.

 
Picture
Hey all! I had a problem; probably you have had it too, where I wanted to make something specific and did not have the appropriate materials on hand. In this case, I wanted to make a fall themed garland or necklace. However, I did not have gold or a good orange on hand so what to do?

I had this bright yellow cotton (forgot to take a picture of the yarn so here is where I used it in something else)

Picture
 and this beautiful tangerine orange cotton. What if I darkened them a bit? So I decided to give them both a tea bath!


Picture
(pic) I first soaked the cotton in water, squeezing them a bit, then put the yarn in warm water with a family sized tea bag. I placed the container in the microwave for two minutes, stirred it around and pressed on the yarn and then microwaved it for another minute.


Picture
(pic) I didn’t want the tea to dye the yarn too much – I just wanted to dull out the colors a bit - so I only soaked them in the tea bath for about 30 minutes. I removed the yarn and rinsed it out until the water ran clear. Turned out great!!

I did try this as well with some white acrylic but after sitting in tea for 12 hours and no change, I added in some coffee, still no change. So guess it only works on natural fibers.


Here are the instructions for the necklace I made if you want one of your own:
Picture
_  Maple Leaf Pattern
Ch2, 5sc in 2nd ch from hook, ch1 and turn (5 sc).
1sc in next 2 ch, 3sc in next, 1sc in next 2 ch, c1 and turn (7 sc).
Dc in 1st ch, ch 2 and ss in top of dc, hdc next ch, (hdc, ch 2 and ss in top of hdc) next ch, (dc, ch 2, ss in top of dc) twice in next ch, (hdc ch 2 and ss) in next ch, dc in last ch, finish off.


Picture
_  Oak Leaf

Chain 6, hdc in 2nd chain from hook and each ch until the end. Ch4 and hdc in 2nd ch and next 2 ch. Ch 2, hdc in 2nd ch (this is the top) ch 4 and hdc in 2nd ch and next 2 ch. Ch5 and hdc in 2nd ch and back to center. Join with initial starting chain and finish off. If you want a stem, add a few chains here.


Picture
_ Pine cone:

Ch10, 3sc in 2nd ch from hook and each ch back to the end. Done! Really that simple. I also cut 4 pieces of green yarn about 4-5 inches long and added 2 strands to each side of the cone as the pine needles.


Picture
_ For the Orange leaf I used: http://windrosefiberstudio.blogspot.com/2011/08/veined-leaf-free-crochet-pattern.html

I used some simply soft brown and green yarn and made chain to the length I wanted it. Then I went back and spaced out the leaves and cones along the chain in random spots. I crocheted each individually by adding the color of the leaf thru one of the chain loops.


So next time your yarn isn’t quite the right color, give dying it a try. It was fun and I want to dye some more!! Thanks for reading!
P.S. My research sites:
http://community.knitpicks.com/notes/Dyeing_-_Tea_Dyeing
http://www.youtube.com/watch?v=mIv3R8Vt-Ek

 
Picture
We recently adopted a puppy from our local shelter (http://www.apsofdurham.org/) and decided to 'adopt' the shelter for a concerted donation effort this year. We started a  by making some fun chew toys for the dogs and cats by using some scraps from our tarning process (tarn is yarn made from t-shirt strips).


Picture
_Kristina wanted the tarn for a rug project but the scraps were fair game! We added a strip from a pair of jeans we cut up for other projects for extra strength and thickness and added a few t-shirt or golf shirt hems. We knotted one end and braided the strips together, knotting it at the other end. Layla loves these!! She runs around the yarn tossing hers in the air. Too cute!!
(you can see a couple tarn balls to the side there)

Picture
We had some smaller hem and scrap pieces so we stacked those and made knots in the middle. We are thinking these would be good for the small dogs, puppies and possibly for the cats to play with.

BTW: If you are looking for a new family member please visit your local animal shelter to adopt a wonderful new addition there and give a dog or cat a new forever home. If you are not interested in adopting a new pet at this time but want to donate time or needed items, visit or call your local shelter to see their needs. According to the shelter here they always need volunteers to help with the animals and pet food is always in short supply.

Picture
_  I love the look of fabric flowers and always wanted to make some so after we were tarned out, we grabbed some of our cloth scraps from the Scrap Exchange and made some!

I surfed the internet for some tutorials and we made several types of flowers after reading over a couple of the sites linked at tip junkie (great site): http://www.tipjunkie.com/fabric-flower-tutorials/


Picture
_ We haven't finished these yet (still have to sew on the felt and then attach to headbands or pins).  After the first one or two we got the hang of it and could make a flower pretty quickly. I think we ended up with about 14 of the flowers in several different styles.

Even though you have to sew or use hot glue, this would still be a fun and inexpensive eco friendly project you could do with your child or as a school project. As a bonus, the flowers can be used to decorate anything!! Let us know if you have a fav flower or any more uses for fabric scraps!

 
Picture
Organization with a craft room

Ok so let’s say you are one of the lucky few who have a room dedicated to your craft. Maybe your kids moved out and you have an old bedroom, maybe you always had an extra room, maybe you were so daring as to add on an extra room just for crafting, perhaps a tower room with a view. Maybe I’m just thinking wishfully about that last one. Whatever the case may be you are standing in an empty room (or maybe not so empty) and wondering where to start.

Step 1: Assess your needs. What crafts do you do? Do you crochet or knit, do you sew, do you scrapbook, do you bead? Get a piece of paper and list what crafts you do, what supplies you store for said crafts and approximately how much space they take up.

Example: Our craft room:

Crochet/Knit: Yarn of varying weights and colors, hooks, misc. other supplies

Sewing: Cloth of varying sizes, sewing machine, ribbons and elastic and other various supplies

That’s pretty much all we have supplies for right now but your list may be different.

Step 2: Assess what would be the best form of storage for your supplies. Scrapbooking is a whole world on its own that I don’t play with but it has many organization options that are just for it such as paper storage and such. For us Yarn seemed best kept in those plastic drawers that are clear so you can see the colors. We keep them color organized, each drawer has a different set of colors so they are easy to find. The cloth we felt would be best folded up and put in a way that we could see all the edges but not covered so we could easily reach over and touch them to feel their weight and texture. For the miscellaneous stuff we decided to go for something simple, baskets to hold our supplies. Also think about work space when you do this, do you need a sewing table and a comfy chair? Do you need an easel? Do you need a couple tables so you can stretch out? Whatever you need fill it in on  your list or make a new one.

Example:

Yarn: Plastic drawers

Cloth: Some sort of shelf or open container

Misc. supplies: Baskets

At least one table, preferably 2 (there are 2 of us after all)

And a photo area (very important for us).

We also needed somewhere to store finished projects ready for sale.

Step 3: Organize what you have. Some of it may be no good but you are hanging on to it because they are your supplies. We had some yarn that looked nasty, either it got dirty or it was so rough that it would never make a good project but it was still really hard to get rid of them. Cull whatever you don’t need, don’t want,or just will not work for you anymore such as damaged goods, ugly goods, or generally unusable items and scraps. If it’s still useable but you don’t like it sometimes schools will take items for crafting but ask first before you donate. Now that you have exactly what you want to store, how many storage solutions will you need? Think about storing what you have now with some room to grow if you think you will collect more in the future (if you are like us, you will). It’s a good idea to do some measuring before you go shopping and I always suggest using what you already have on hand whenever possible. Do you already have a craft table? Do you already have some storage (likely you have some to start with or where else would your stuff be?) that you can use or repurpose?

If you can (not all of us think well this way) draw a map of your room as much to scale as you can and fill in your dream room. Map out where your work area will go first as it is actually the most important. If you need a table and there is nowhere to put it because of all the drawers and cabinets then you will not want to work in there. It’s also great to give it the prime realty like in front of the window, for example. Around your work area(s) map where you want the previously listed storage options to go. If you are pretty close to scale you should be able to figure out how many of each you can store. Begin arranging what you have (if you need to paint or re-do the floors do that before you move stuff in of course) and then fill in what you want to get when you get it. If you are like us you are on a tight budget and may not be able to get it all at once. If you are handy or have a handy person around you can build some storage options like we did. Lastly don’t forget to personalize your room. Put in decorations, inspirations, pictures and such.

Step 4: Most important! Sit in your new craft area. Look around, maybe work on a project. Do you feel comfortable? Do you feel crowded? Is it too dark, too bright? As you work on your project are you able to find what you need? Are your most used items close at hand? A small basket for often used items is a good idea, one with a handle so you can carry it with you or a tote bag so you can pick it up and go. If you don’t feel comfortable fix any issues that come up. It may take a few tries before you get it perfect but don’t get discouraged. You may even find that your needs will change as you grow as a crafter. Just re-assess your needs and adjust accordingly.

I hope this helped you organize your thoughts for your craft room; don’t forget to put it in use. It won’t do any good if you don’t actually do it. Tune in same day next week to see how our room is organized. 

Picture
 
Picture
We had a great lunch at Christmas! A delicious cajun fried turkey with all the fixings and throw in some hungry family.

Instead of boring you with a bunch of photo's and captions, we made a slide show!

Thanks for reading our blog!
Millie & Kristina

 
Picture
I think I mentioned that we have adopted a wonderful dog, Layla, from the local shelter. To welcome her home and give her a space of her own, I decided to sew a doggie bed for her.
(Please support your local aps or rescue shelter! Even if you are unable to adopt a pet, these shelters need volunteers to help with office work, walking the dogs, socializing the animals, donations of food and more.)

Picture
Bob, my grandson, had outgrown his baby quilt so I decided to recycle it into a cushy bed for Layla. I put two layers of quilt batting inside and folded the quilt in half. Layla is short but long!


Picture
Next I sewed around the outside of the quilt, catching all layers. As you can probably tell, it was a bit thick for my machine but it kept going. It's a Singer Simple and is a real trooper :)


Picture
Finally I stitched back and forth on an angle, going in both directions. And it is done! Not very pretty maybe but it will work!

Our plan is to make more of these type of upcycled blankets to donate to our local shelter. Google for a shelter near you that could use your help!


Picture
Layla has fit right in with this crazy family. She chews anything that falls her way, loves to dig in the garden and get's so excited to go for a walk. I know she is so happy to be out of the shelter and she would love to know that other people are also adopting from the shelter. If you are ready for some unconditional love, visit your local shelter and find your new sweetheart!

    Loading

    Subscribe to our mailing list

    * indicates required
    Follow on Bloglovin
    We are making the move to Word Press with the help of our friend Janine (J9)
    J9 Designs

    Authors

    Millie and Kristina
    Mother and Daughter

    Blogging about crochet, crafts, upcycling and having tons of fun :)

    Click here to see all of our free and paid patterns
    Picture
    Click to Enter Thirty One Giveaway Portion of sales to benefit Hope Animal Rescue!
    Picture
    Click to Enter!
    Picture
    Click to enter!
    Picture
    Click to Enter!

    Categories

    All
    101 Jeans
    A Day In The Life
    Charity
    Crafting Fun
    Free Pattern/tutorial
    Giveaway
    Link Parties
    Organization
    Review

    Awesome Sponsors & Button Swaps
 photo 8d0e0b89-77a5-40db-b80f-bc91e6107a60_zps9bd793a4.jpg
Nugget On A Budget
Better Blogger Network
Holiday Shopping/
Affiliate Links
teeturtle tshirt
100% of profits provide clean water and education - Three Avocados

Archives

November 2013
October 2013
September 2013
August 2013
July 2013
June 2013
May 2013
April 2013
March 2013
February 2013
January 2013
December 2012
November 2012
October 2012
September 2012
August 2012
July 2012
June 2012
May 2012
April 2012
March 2012
February 2012
January 2012
December 2011
November 2011
October 2011

Knitting Supplies at Craftsy.com